Table of Contents
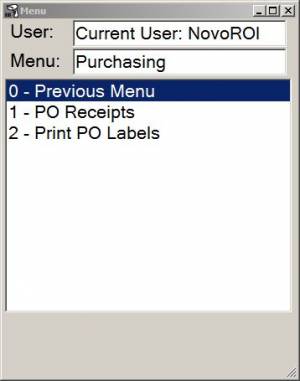
Purchasing
Purchase Order Constants
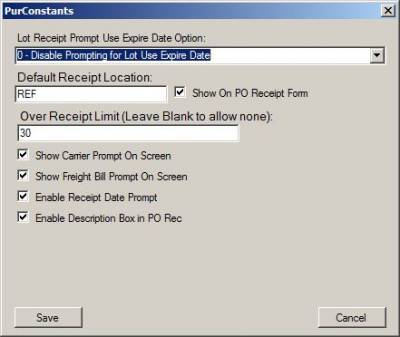
Set up Purchase Order Constants by going to the System Admin Menu → System Constants → Purchase Constants
Lot Receipt Prompt Use Expire Date Option
This prompt has the following options:
- 0 – Turn off lot use expire date prompting in PO.RECEIPTS
- 1 – Prompt for lot use expire date on new lots and or current date is null
- 2 – Always prompt for lot expiration date
Default Receipt Location
This should be a REF type location (although any location is allowed). This will be the default location sent as the receipt location.
Show on PO Receipt Form
Toggle to disable/enable the Default Receipt Location from displaying on the PO Receipt form.
Over Receipt Limit
Enter the maximum over-receipt percentage for PO.RECEIPTS. Leaving this field blank means Over Receipts are not allowed.
Show Carrier Prompt On Screen
Toggle to disable/enable the carrier prompt in PO.RECEIPTS.
Show Freight Bill Prompt On Screen
Toggle to disable/enable the freight bill prompt in PO.RECEIPTS.
Enable Receipt Date Prompt
Toggle to disable/enable the entry of the receipt date rather than taking the current date as the automatic answer in PO.RECEIPTS.
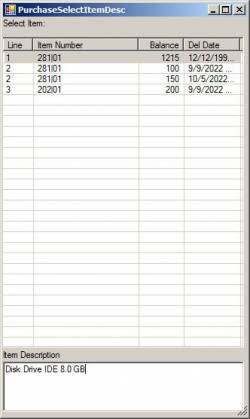
Enable Description Box in PO Rec
Toggle to disable/enable the item number description box in the PO Receipts Select Items screen. If this setting is enabled, the user will see the highlighted item's description displayed at the bottom of the screen, which can be helpful in allowing the user to select the correct item to receive.
PO Receipts
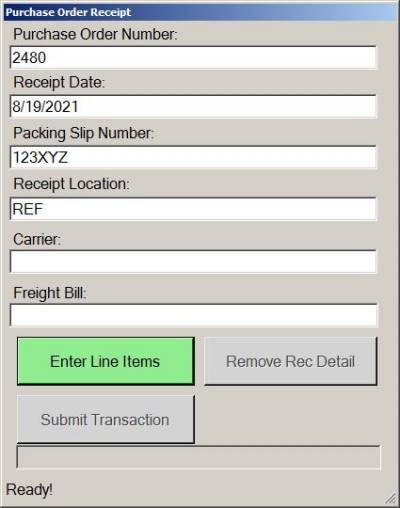
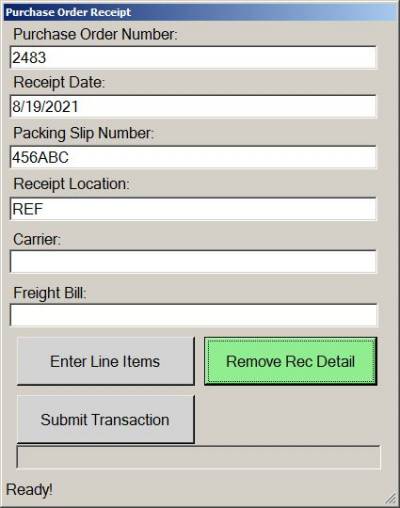
Purchase Order Number
Enter any open purchase order number.
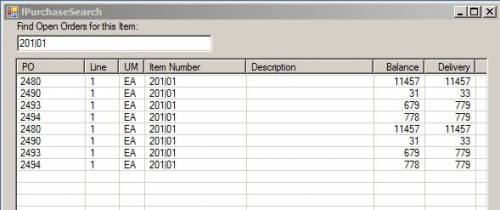
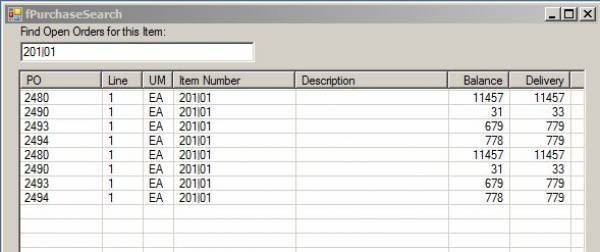
- Hitting <enter> with no purchase order number will bring up the Purchase Search screen to search for a Purchase Order by item number.
Receipt Date
Entry in this field is allowed based on Purchase Constants setting for Enable Receipt Date Prompt. If enabled, any date is allowed.
Packing Slip Number
Enter the packing slip number provided by the vendor or assigned by receiving.
Receipt Location
The Receipt Location defaults from Purchase Constants. Enter any valid REF location.
Carrier (not required)
Enter the carrier who delivered the order.
Freight Bill (not required)
Enter the freight bill number from the paperwork.
Enter Line Items
Hit the Enter Line Items button to move to the Purchase Order Detail screen.
Purchase Order Detail: Enter Line Items
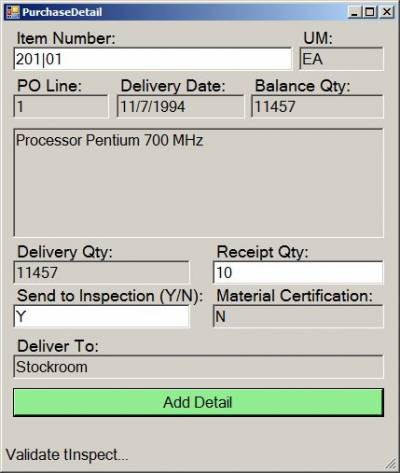
Item Number
Enter the Item Number.
Please Note: The long part number or the superseded part number for an item may also be entered into the Item Number field to bring up the results for that item number. For example:
- If 110 is the superseded part number for 100, entering 110 into the Item Number field will bring up results for item 100.
- If 1234567 is the long part number for item 100, entering 1234567 into the Item Number field will bring up results for item 100.
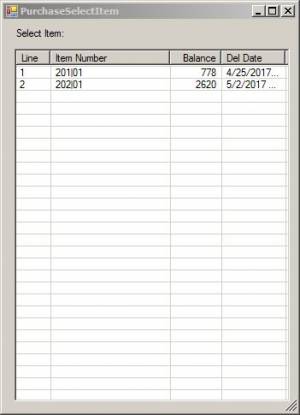
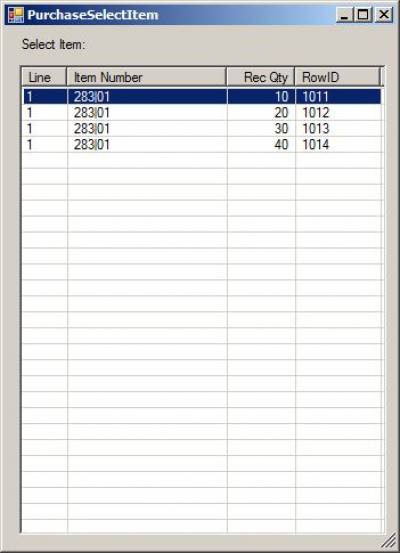
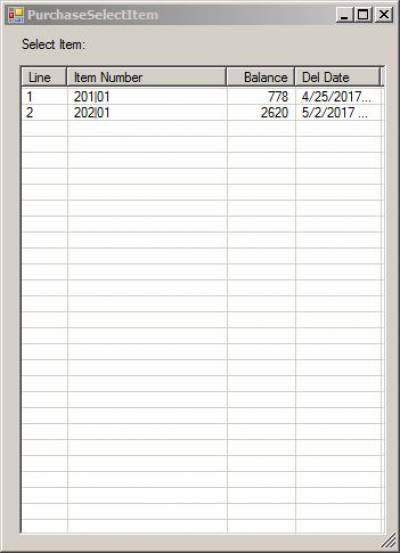
Hitting <enter> with no item number will bring up the Purchase Select Item screen to select item numbers by line item.
Please note, if the Enable Description Box in PO Rec constant is enabled, the user will see the item description of the highlighted item displayed at the bottom of the screen, as shown below in the screenshot on the right.
Once the Item Number is entered, the following fields will automatically fill in. These are display-only fields, based on the information entered for the PO in the ERP system.:
- UM
- PO Line
- Delivery Date
- Balance Quantity
- Item Description
- Delivery Quantity
- Material Certification
- Deliver To Location
Receipt Qty
Enter the Receipt Qty.
- Receipt Qty cannot exceed Balance Qty if the Over Receipt Limit in PO Constants is left blank.
- If the items being received are serial tracked or lot traced, entry of serial numbers or lots will be required after the quantity is entered.
Send to Inspection (Y/N)
Enter Y or N. The default comes from the Purchase Order Line Item Information previously entered during PURCHASE and populated via the NEXUS.PO.LINES schema.
Material Certification
Displays a Y (for Yes) or a N (for No) for a Material Certificate flag.
Add Detail
Click to add this line item.
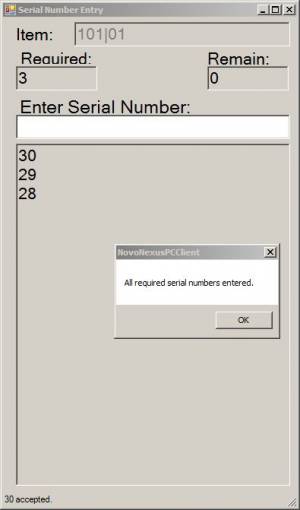
Serial Number Entry
If the item number being received is serial tracked, the Serial Number Entry screen will open after the Receipt Qty is Entered.
A serial number must be entered for each item being received. Once all serial numbers are entered, the user will be redirected back to the Purchase Detail screen.
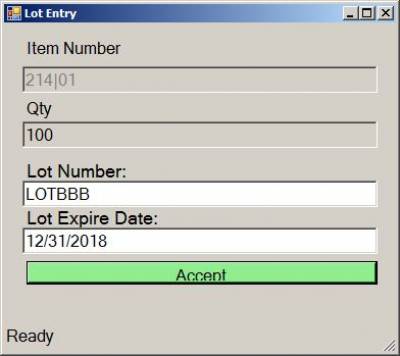
Lot Entry
If the item number being received is lot traced, the Lot Entry screen will open after the Receipt Qty is Entered.
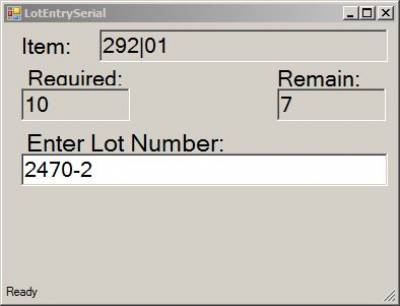
Depending on the Lot Entry Screen Method set in Inventory Constants, one of the following Lot Entry screens will open.
Standard Lot Entry:
- Enter the lot number for the item being received. The lot number is entered one time only.
- If the item being received has more than one lot number, each lot number must be entered as a separate Purchase Detail line item.
- If the Purchase Constants are set to require entry of a Lot Expire Date, you will be prompted to enter a lot expiration date.
Serial Lot Entry:
- Enter the lot number once for each quantity of the item being received. For example, if there are 10 items being received, the lot number will need to be entered 10 times.
- If the item being received has more than one lot number, each set of lot numbers must be entered as a separate Purchase Detail line item.
- Serial Lot Entry does not currently support the entry of a Lot Expire Date.
Once the lot number has been entered and accepted, the user will be redirected back to the Purchase Detail screen.
After entering a line item, the user can either continue to add Line Items on the Purchase Detail screen or exit the Purchase Detail screen by hitting the esc key.
Once back at the main Purchase Order Receipt screen, the user has four options:
- Enter Line Items: Hit this button to return to the Purchase Detail screen and enter more line items
- Remove Rec Detail: Hit this button to remove line items from the received detail.
- Submit transaction: Hit this button to send all received detail for the PO to the ERP system.
- Exit the function: Hit the esc key to exit the function. All received detail for the PO will be saved in the app, but will not be sent to the ERP system.
Remove Rec Detail
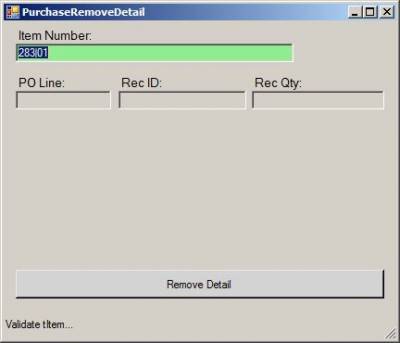
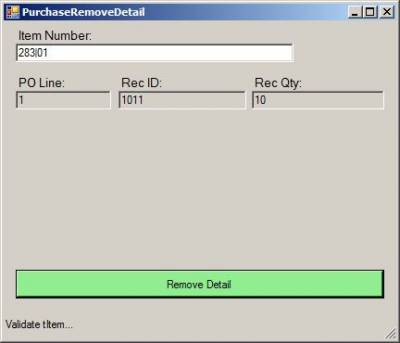
The Remove Rec Detail feature allows the removal of one or more of the received line items to be removed from the PO Receipt before the detail is submitted to the ERP system. From the main Purchase Order Receipt screen, hit the Remove Rec Detail button.
Enter the item number to be removed:
All received detail for the item on this PO will be displayed. Choose the desired line.
Please Note: Hitting <enter> with no item number entered on the Purchase Remove Detail screen will bring up all the item numbers and detail received for this PO.
Once the desired line is chosen, it will display on the Purchase Remove Detail screen for review.
Hit the Remove Detail button to remove the received detail.
The balance quantity available on the NovoNexus app will be increased accordingly and the removed quantity is now available for receiving.
Continue to remove and/or receive line items until the transaction is ready to be submitted to the ERP system.
Submit Transaction
Please Note:
- The Remove Rec Detail button can be used if you do not want to submit some or all of the line item details entered. This must be done before the Submit Transaction button is hit.
- Corrections and negative quantity transactions are not allowed once the details are submitted.
- Please correct errors in the ERP system if the received details have already been submitted.
Print PO Labels
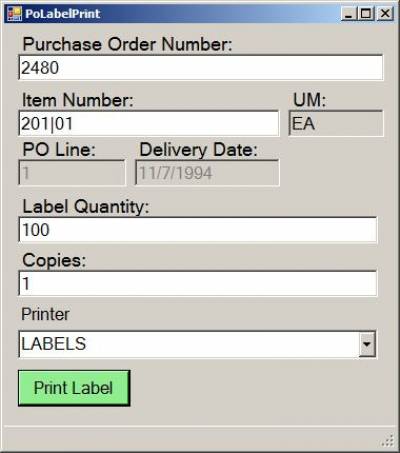
Purchase Order Number
Enter any open purchase order number.
- Hitting <enter> with no purchase order number will bring up the Purchase Search screen to search for a Purchase Order by item number.
Item Number
Enter the Item Number.
Please Note: The long part number or the superseded part number for an item may also be entered into the Item Number field to bring up the results for that item number. For example:
- If 110 is the superseded part number for 100, entering 110 into the Item Number field will bring up results for item 100.
- If 1234567 is the long part number for item 100, entering 1234567 into the Item Number field will bring up results for item 100.
Hitting <enter> with no item number will bring up the Purchase Select Item screen to select item numbers by line item.
Label Quantity
The number entered here will print on the label.
Copies
The number entered here controls how many labels will print.
Printer
Select a printer. Printer options are available in the dropdown list.
Print Label Button
Hit the Print Label button to print the labels.
