This is an old revision of the document!
Table of Contents
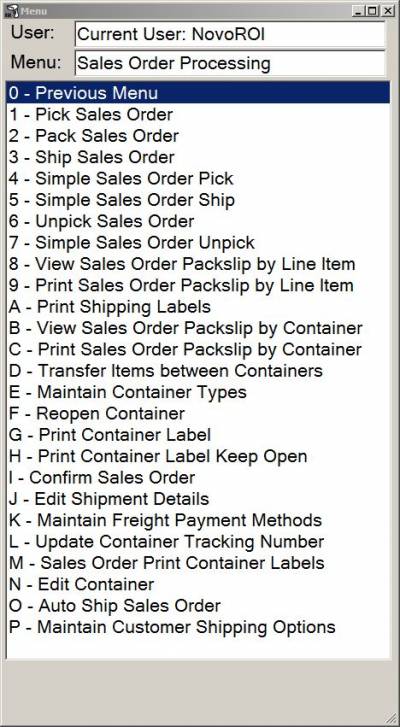
Sales Order Processing
Sales Order Processing (SOP) Constants
Set up Sales Order Processing Constants by going to the System Admin Menu → System Constants → SOP Constants
The General Options, Default Ship from Address, and Container Options tabs in SOP Constants need to be filled out for the Sales Order Processing menu functions.
Please Note:The Pick To Light and Load Processing tabs are for Advanced Sales Order Processing functions and do not need to be addressed for standard Sales Order Processing.
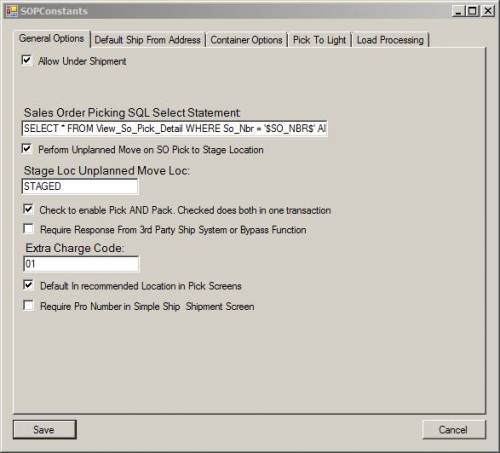
General Options Tab
Allow Under Shipment
Toggle to enable the ability to under ship a sales order.
- If this constant is not toggled, under shipments will not be allowed in either Simple Shiping or Advanced Shipping.
- Simple Shipping: If this box is toggled, the shipment will be allowed with no warning to the user.
- Advanced Shipping: If this box is toggled, the user will receive a warning message indicating an under shipment is about to occur but will be able to complete the shipment.
Sales Order Picking SQL Select Statement
The following Select Statements control how the data is sorted in the Sales order Processing Picking screens:
- To sort by Location: SELECT * FROM View_So_Pick_Detail WHERE So_Nbr = '$SO_NBR$' AND Shipment_Nbr = '$SHIPMENT_NBR$' Order by PickLoc
- To sort by Item Number: SELECT * FROM View_So_Pick_Detail WHERE So_Nbr = '$SO_NBR$' AND Shipment_Nbr = '$SHIPMENT_NBR$' Order by Part_Nbr
- To sort by Balance: SELECT * FROM View_So_Pick_Detail WHERE So_Nbr = '$SO_NBR$' AND Shipment_Nbr = '$SHIPMENT_NBR$' Order by OpenBalance
All options will sort from lowest value to highest value unless you indicate Desc at the end of the statement.
Perform Unplanned Move on SO PICK to Stage Location
Toggle to enable an Unplanned Move transaction to a stage location when items are picked from a sales order. As soon as the items are picked, they will be moved from their pick location to a stage location and will be unavailable for picking on another order. When the sales order is shipped, the items will process out of the stage location in a SALE transaction.
Stage Loc Unplanned Move Loc
Indicate the stage location here for the Unplanned Move on SO Pick when the Unplanned Move on SO Pick to Stage Location constant is enabled.
Please Note:This location must be set up in M2k as a WHSE type location in M2k. The location in the example above is called STAGED and is set up as a WHSE location.
Check to Enable Pick AND Pack. Checked does both in one transaction.
Toggle to enable a combined Pick AND PACK as one transaction for Advanced Shipping transactions. When enabled, the user will use the Pick Sales Order function to initiate a Pick and Pack transaction. Once a line item is picked, the pack screen will automatically open. Upon accept, both the pick and pack will happen at the same time.
Please Note:If this constant is enabled, the Pack function will not be directly accessible from the Sales Order Processing menu. It will only be accessible as part of the Pick function.
Require Response from 3rd Party Ship System or Bypass Function
Toggle to require a response from a 3rd Party shipping or freight rating system.
Please Note: Using 3rd Party Shipping Software requires a custom customer interface.
Extra Charge Code
Set an extra charge code here for use with 3rd Party Shipping Software.
Default In Recommended Location In Pick Screens
Check to enable the Recommended Location to default into the location prompt in the Sales Order pick screens. This saves the user from entering the pick location in situations where the recommended location is frequently the pick location. However, the user can override the default if needed.
Please Note: The Recommended Location for picking will be the location with the highest on-hand quantity for the item being picked.
Require Pro Number in Simple Ship Shipment Screen
Toggle to enable a Pro Number being required in the Simple Sales Order Ship screen. The user will be required to enter the Pro Number before the transaction will be accepted and the order shipped. This constant applies only to the Simple Sales Order Ship screen.
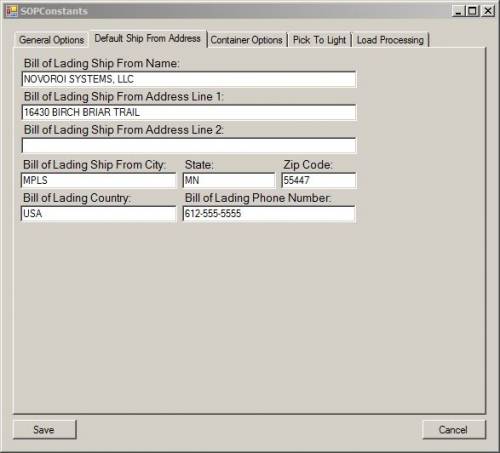
Default Ship From Address Tab
Fill in the Bill of Lading Ship From Name, Address Lines, City, State, Zip Code, Country and phone number for display on the Sales Order Packslips, labels and/or documents that come out of the NovoNexus SOP system.
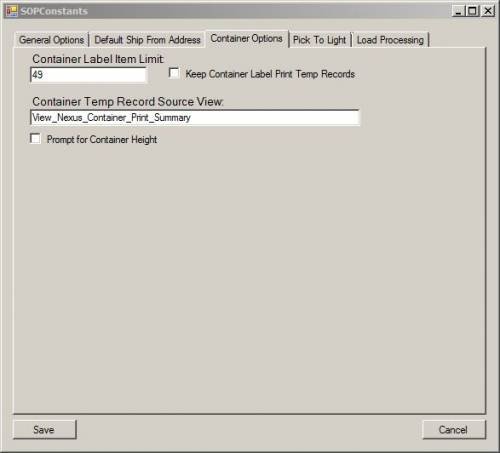
Container Options Tab
Container Label Item Limit
Use this constant to set the maximum number of items that can be included on a container label for printing.
Keep Container Label Print Temp Records
Toggle to enable Container Label print temporary records to be kept in the NEXUS_CONTAINER_PRINT_TEMP table in SQL.
Container Temp Records Source View
Set the View used to populate the NEXUS_CONTAINER_PRINT_TEMP table in SQL.
The default View is View_Nexus_Container_Print_Summary
Prompt for Container Height
Toggle to enable a field for Container Height on the Print Container Label screen.
NovoNexus Simple Shipping
The NovoNexus Simple Ship functions allow a user to pick a sales order and then ship a sales order without using any containers. Lots and serial numbers are supported in Simple Shipping.
Please Note: Once items are picked on a SO-Shipment using the Simple Shipping function, the SO-Shipment will be restricted to picking and unpicking using only the Simple Shipping functions. If all items are unpicked, then the SO-Shipment will be open again to initiate either Simple or Advanced Shipping.
Simple Sales Order Pick
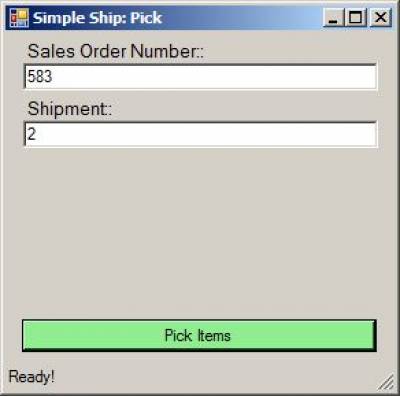
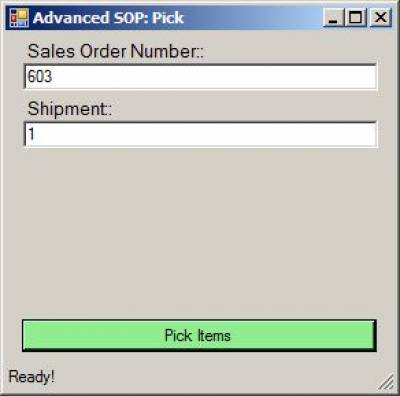
Sales Order Number
Enter the sales order number
Shipment
Enter the shipment number.
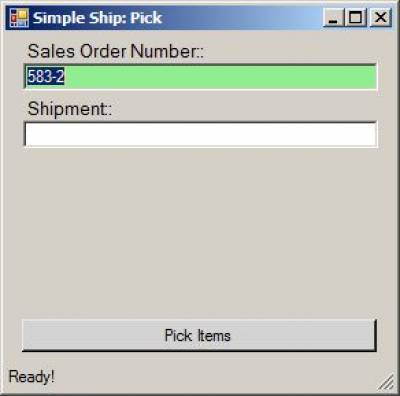
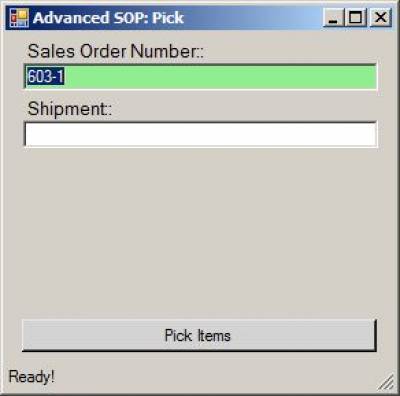
Please Note: Entering the sales order and shipment combination into the Sales Order Number field, using the format Sales Order-Shipment (for example 583-2), will automatically place the numbers in the correct fields.
This can be done either manually or by scanning a barcode that has the Sales Order-Shipment number in it.
Pick Items
Hit <enter> to accept the sales order and shipment number and begin to pick items.
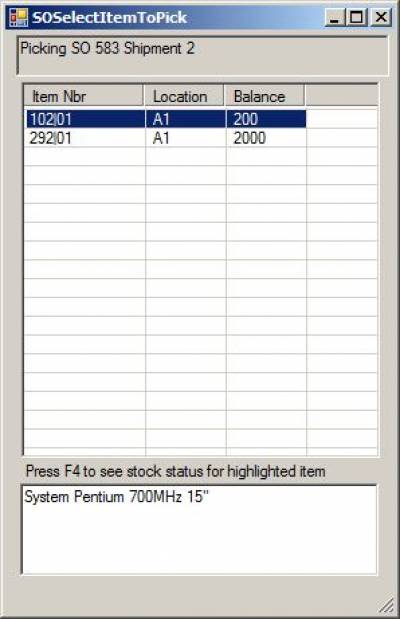
So Select Item To Pick Screen
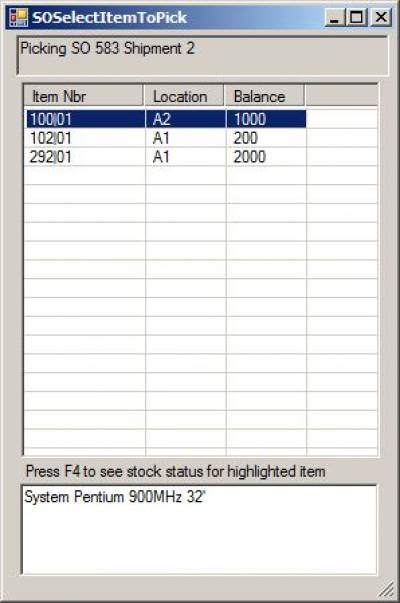
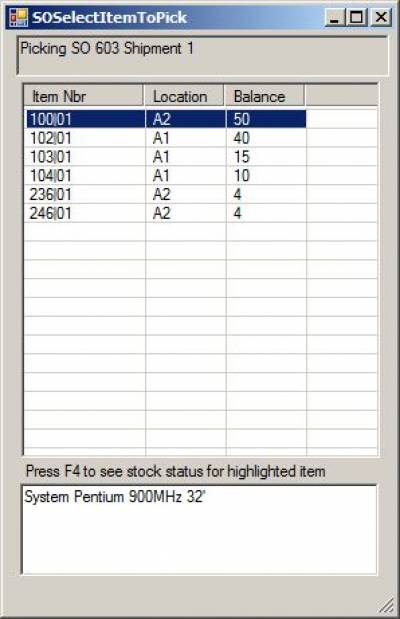
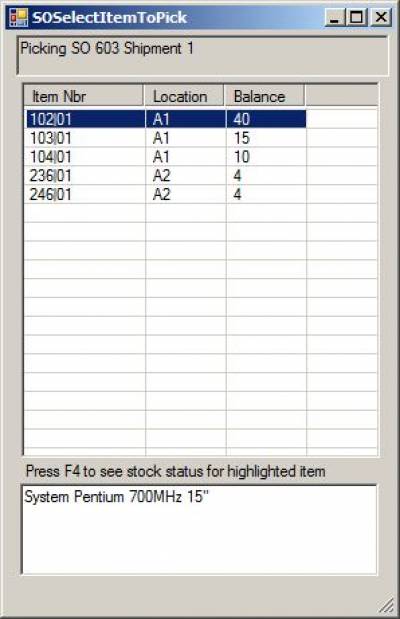
Upon hitting <enter> on the Pick Items button, the SO Select Item to Pick screen will open in another window.
This screen displays all the items to be picked for the sales order, a suggested location for picking (based on the location with the most quantity for the item being picked), and the balance (quantity remaining) for the item to be picked.
Use the arrow keys to maneuver to the item being picked. The selected row with be highlighted.
- Press F4 to open a Stock Status screen for a highlighted item.
- Press <enter> to open the Pick Detail screen and pick items for a highlighted line.
SO Enter Item Pick Details Screen
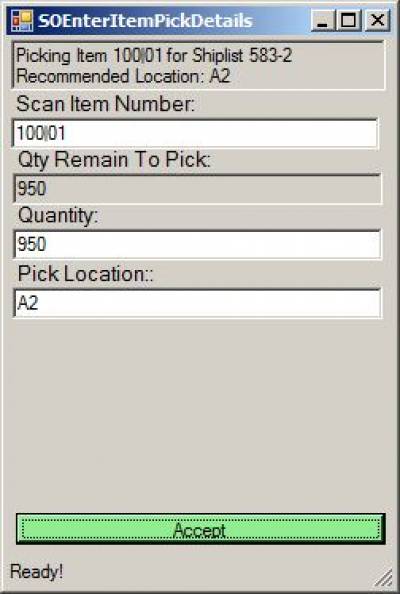
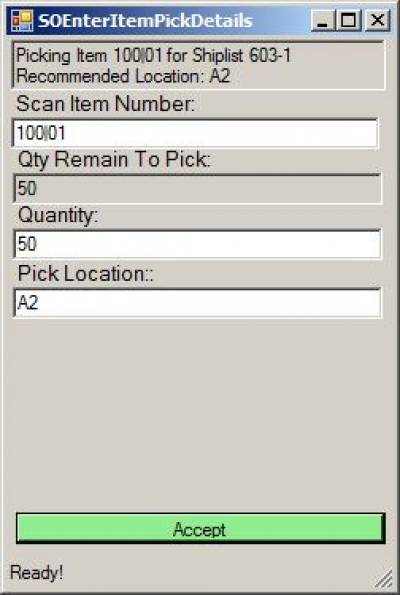
At the top of the screen, the item number and shiplist information will display for verification, along with the Recommended Location for picking.
Please Note: The Recommended Location for picking is the location with the greatest on-hand quantity for the item being picked.
Scan Item Number
Scan or type in the item number being picked. This field is required to provide verification that the user is picking the correct item.
Please Note: The long part number or the superseded part number for an item may also be entered into the Scan Item Number field to bring up the results for that item number. For example:
- If 110 is the superseded part number for 100, entering 110 into the Scan Item Number field will bring up results for item 100.
- If 1234567 is the long part number for item 100, entering 1234567 into the Scan Item Number field will bring up results for item 100.
Qty Remain to Pick
This is an informational field that displays the quantity remaining to be picked for this item.
Quantity
Enter the quantity being picked.
- The user may enter a quantity up to but not over the quantity remaining to be picked. (*see note below about quantities and negative inventory)
- Partial amounts may be picked.
- The user may come back to this screen later to pick any remaining balance for the item.
- If “Allow Under Shipment” is selected in SOP Constants, the user will not be required to pick the entire balance of items on the shiplist in order to ship the transaction.
Pick Location
Enter the location from which the item is being picked.
- If the Default In Recommended Location In Pick Screens is enabled in the SOP Constants, the recommended location will pre-fill into the Pick Location field. Hit <tab> or <enter> to accept the recommended location. or change it to a different location before preceding.
- The location entered here does not need to match the Recommended Location. The user may enter any location with enough quantity available. (*see note below about quantities and negative inventory)
- The user may pick a partial balance of an item from one location and then pick the remainder of the balance from one or more other locations.
- Please Note: When lots and serial numbers are allocated, then the locations chosen must contain the lot numbers and serial numbers indicated by the allocation.
*A note about quantities and negative inventory
The SOP picking functions follow the constant settings in the NovoNexus Inventory Constants for negative inventory:
- If the negative inventory constant is set to error a negative inventory transaction, the user will not be allowed to drive inventory negative in a location when picking.
- If the negative inventory constant is set to warn of a negative inventory transaction, the user will be warned, but will then be allowed to drive inventory negative in a location when picking.
- If the negative inventory constant is set for NO error or warning with a negative inventory transaction, the user will be allowed to drive inventory negative in a location when picking, with no error message and no warning.
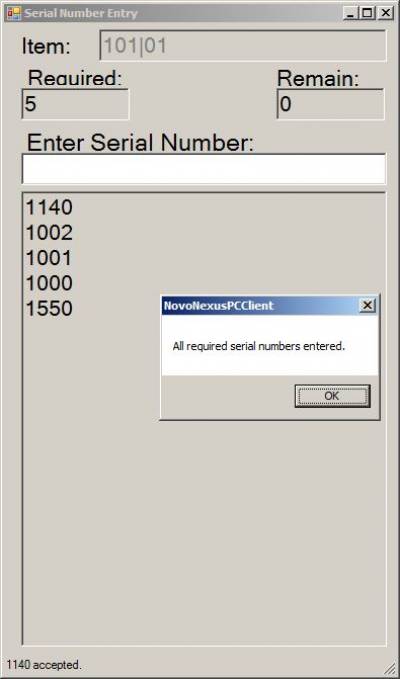
Serial Number Entry
If the item number being picked is serial tracked, the Serial Number Entry screen will open after the Pick Location is entered.
- A valid serial number for the item must be entered for each item being picked.
- The serial number must have a status of On Hand in the location from which the item is being picked.
- If the serial numbers are allocated to the sales order, the serial numbers must match what is allocated to the sales order.
Once all serial numbers are entered, the user will be redirected back to the So Enter Item Pick Details screen to complete the transaction.
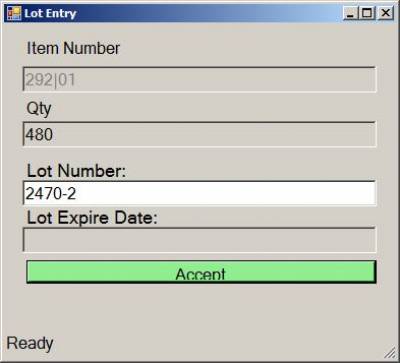
Lot Entry
If the item number being picked is lot traced, the Lot Entry screen will open after the Pick Location is entered.
Depending on the Lot Entry Screen Method set in Inventory Constants, one of the following Lot Entry screens will open.
Standard Lot Entry: Enter the lot number for the item being picked. The lot number is entered one time only.
If lot numbers are allocated to the sales order, the lot number entered must match what is allocated to the sales order.
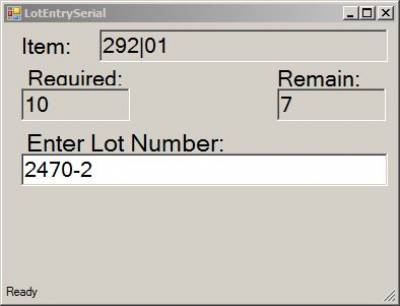
Serial Lot Entry: Enter the lot number once for each quantity of the item being picked. For example, if there are 10 items being picked, the lot number will need to be entered 10 times.
If lot numbers are allocated to the sales order, the lot number entered must match what is allocated to the sales order.
Once the lot number is accepted, the user will be redirected back to the So Enter Item Pick Details screen to complete the transaction.
Accept the Pick
Hit <enter> to accept the pick.
Please note: If the Perform Unplanned Move on SO PICK to Stage Location constant is enabled, an Unplanned Move transaction to a stage location will take place when items are picked. As soon as the items are picked, they will be moved from their pick location to the stage location indicated in the Stage Loc Unplanned Move Loc constant, and the items will be unavailable for picking on another order. When the sales order is shipped, the items will process out of the stage location in a SALE transaction.
Return to SO Select Item to Pick Screen
After accepting a pick, the user will be brought back to the SO Enter Items to Pick Screen to pick the remaining items on the shiplist.
Any items that have been picked in their entirety will no longer show on this screen. Only items with a remaining quantity to pick balance will be displayed.
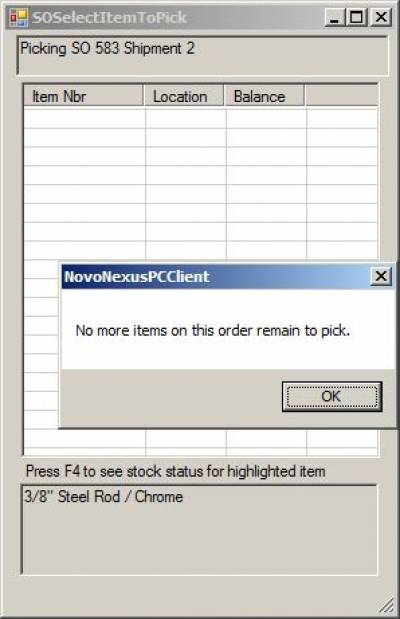
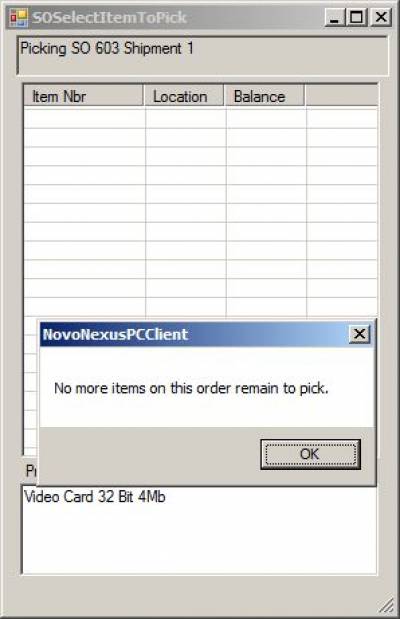
Continue to select and pick items until done picking. When the last item is picked, the user will see the following message indicating all items have been picked:
When picking is completed, the user can proceed to the Simple Sales Order Ship function. If “Allow Under Shipment” is selected in the SOP Constants, not all items need to be picked to proceed to the Simple Sales Order Ship function.
Simple Sales Order Unpick
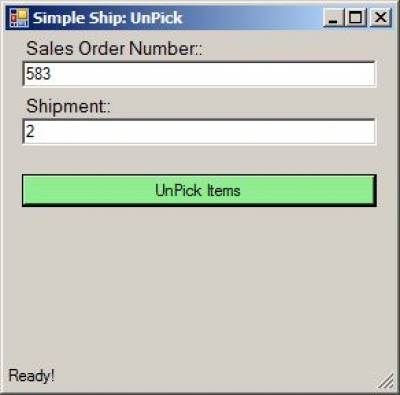
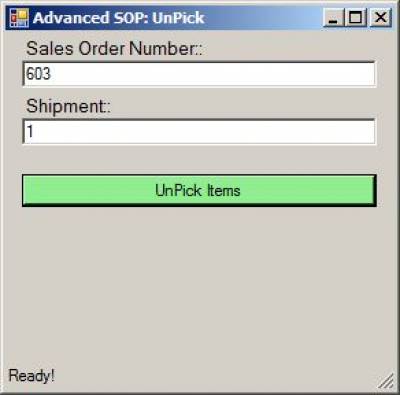
Sales Order Number
Enter the sales order number
Shipment
Enter the shipment number. As with the Simple Sales Order Pick screen, entering the whole sales order and shipment number combination into the Sales Order Number field, using the format Sales Order-Shipment Number (for example 583-2), will automatically place the numbers in the correct fields. This can be done either manually or scanning a barcode that has the Sales Order-Shipment number in it.
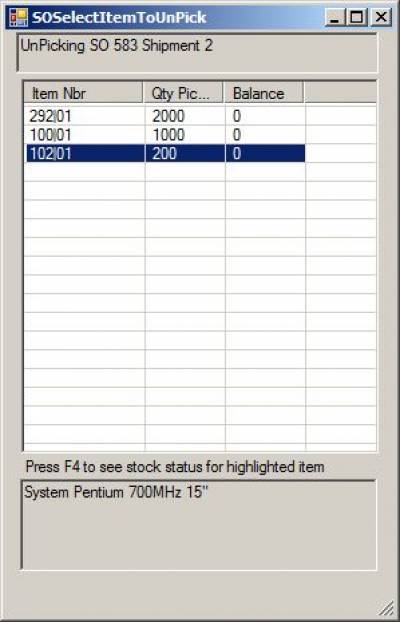
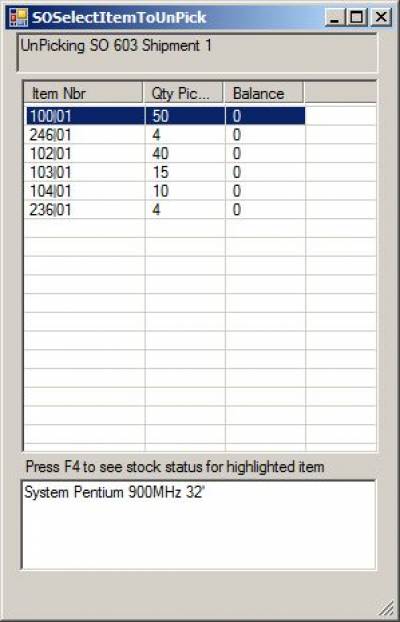
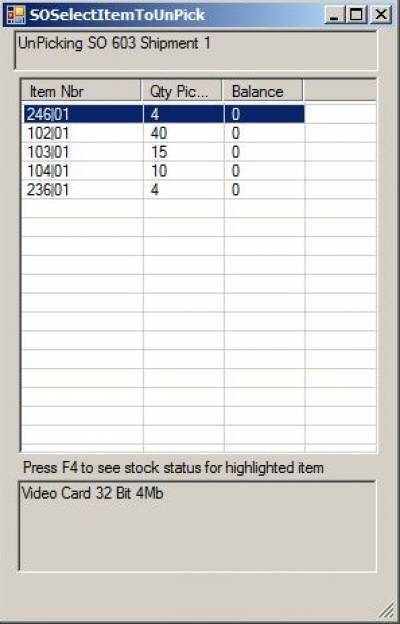
SO Select Item to UnPick Screen
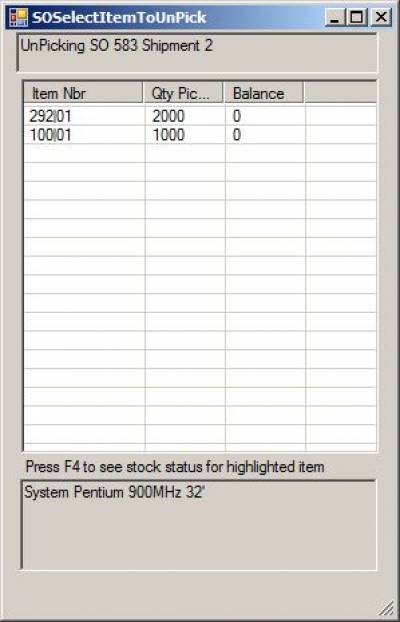
This screen displays all the items available to be unpicked from the sales order, the quantity already picked, and the balance (quantity remaining) that is not yet picked.
Use the arrow keys to maneuver to the item being unpicked. The selected row with be highlighted.
- Press F4 to open a Stock Status screen for a highlighted item.
- Press <enter> to open the UnPick Detail screen and pick items for a highlighted line.
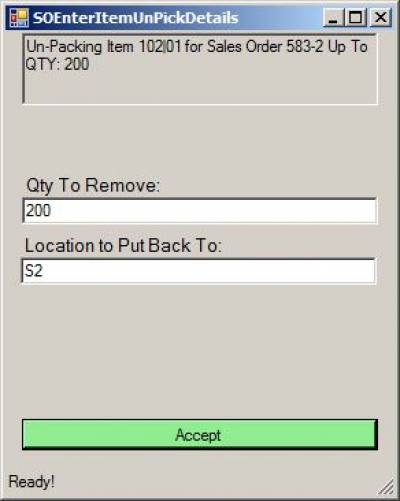
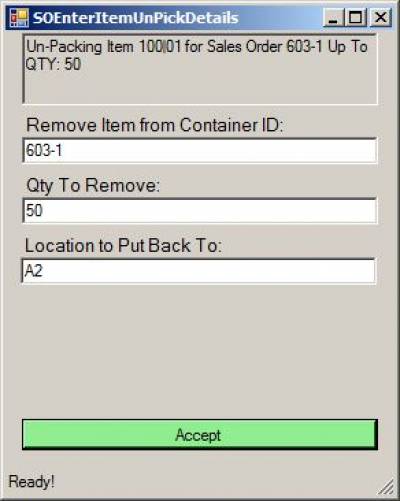
SO Enter Item UnPick Details Screen
At the top of the screen, the item number and sales order information will display for verification. In addition, the total quantity available to unpick is displayed.
Qty To Remove
Enter the amount to be unpicked.
Location to Put Back To
Enter the location where the unpicked items will be put back.
Serial Number Entry
If the item number being unpicked is serial tracked, the Serial Number Entry screen will open after the Location is entered.
A valid serial number for the item must be entered for each item being unpicked. In addition, the serial numbers must be the same serial numbers that were previously picked for this sales order. Once all serial numbers are entered, the user will be redirected back to the So Enter Item UnPick Details screen to complete the transaction.
Lot Entry
If the item number being unpicked is lot traced, the Lot Entry screen will open after the Location is entered.
Enter the Lot Number for the items being unpicked. The lot number entered must be the lot number that was used when picking these items.
Hit <enter> to accept the lot number. Once the lot number is accepted, the user will be redirected back to the So Enter Item UnPick Details screen to complete the transaction.
Accept the UnPick
Return to SO Select Item to UnPick Screen
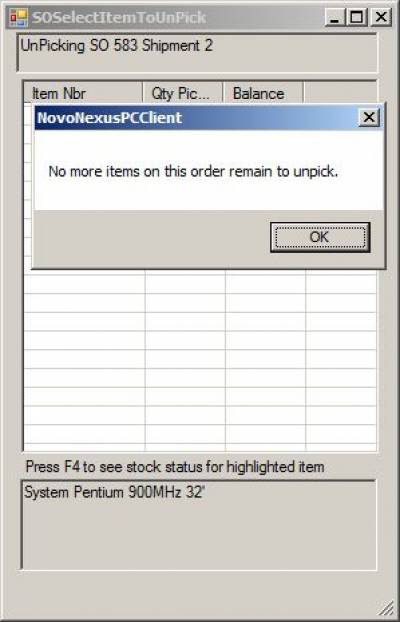
After accepting an unpick, the user will be brought back to the SO Enter Items to UnPick Screen to unpick any remaining items that need to be unpicked. Any items that have been unpicked in their entirety will no longer show on this screen. Only items with a remaining quantity to unpick will be displayed.
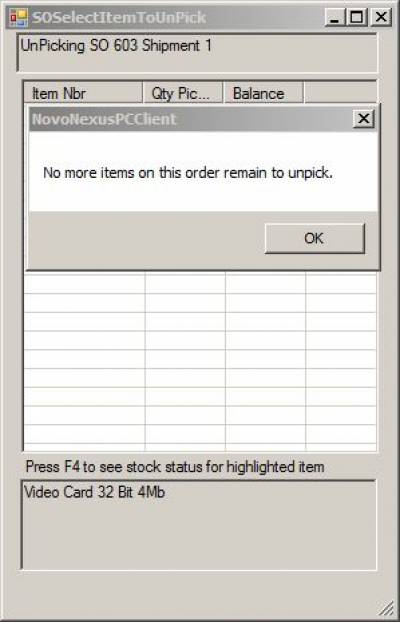
Continue to select and unpick items until done unpicking. When the last item is unpicked, the user will see the following message indicating all items have been unpicked:
Simple Sales Order Ship
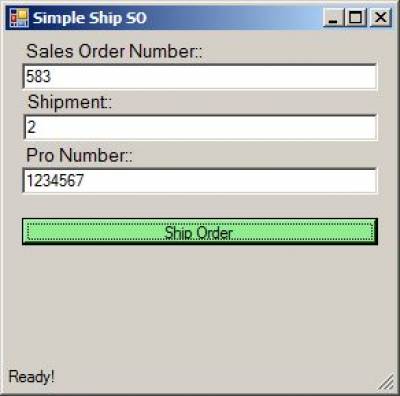
When all of the Simple Sales Order items have been picked, use the Simple Sales Order Ship function to ship the sales order.
Sales Order Number
Enter the sales order number
Shipment
Enter the shipment number. As with the Simple Sales Order Pick screen, entering the whole sales order and shipment number combination into the Sales Order Number Field, using the format Sales Order-Shipment number (for example 583-2), will automatically place the numbers in the correct fields. This can be done either manually or scanning a barcode that has the Sales Order-Shipment number in it.
Pro Number
Enter the PRO tracking number here. If the Require Pro Number in Simple Ship Shipment Screen constant is enabled, this field will be required. If the constant is not enabled, this field will be optional.
Ship Order
Hit <enter> to accept the transaction and ship the sales order. The shipment details will be sent to your ERP system.
Please Note:
- If “Allow Under Shipment” is selected in SOP Constants, the user will not receive a warning if the sales order was not fully picked. The transaction will ship as it is.
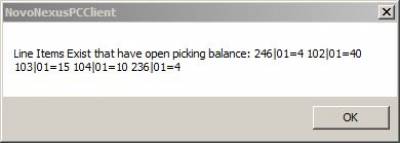
- If “Allow Under Shipment” in NOT selected in SOP Constants, the user will be blocked from shipping the order if it was not fully picked. The entire order will need to be picked before it can be shipped. The user will receive an error similar to the following, indicating that the sales order has line items with an open picking balance. The items with an open picking balance will be listed for review:
NovoNexus Advanced Shipping
(Advanced Shipping documentation is in process)
The NovoNexus Advanced Shipping functions allow a user to pick and pack a sales order using containers. Lots and serial numbers are supported in Advanced Shipping.
Please Note: Once items are picked on a SO-Shipment using the Advanced Shipping functions, the SO-Shipment will be restricted to picking and unpicking using only the Advanced Shipping functions. If all items are unpicked, then the SO-Shipment will be open again to initiate either Simple or Advanced Shipping.
There are two options for picking and packing in Advanced Shipping:
- Option 1 - Pick and pack as two separate transactions
- Option 2 - Pick and pack together in one transaction
Sales Order Pick (with Pick and then Pack as separate transactions)
Sales Order Number
Enter the sales order number
Shipment
Enter the shipment number.
Please Note: Entering the sales order and shipment combination into the Sales Order Number field, using the format Sales Order-Shipment (for example 583-2), will automatically place the numbers in the correct fields.
This can be done either manually or by scanning a barcode that has the Sales Order-Shipment number in it.
Pick Items
Hit <enter> to accept the sales order and shipment number and begin to pick items.
So Select Item To Pick Screen (with Pick and then Pack as separate transactions)
Upon hitting <enter> on the Pick Items button, the SO Select Item to Pick screen will open in another window.
This screen displays all the items to be picked for the sales order, a suggested location for picking (based on the location with the most quantity for the item being picked), and the balance (quantity remaining) for the item to be picked.
Use the arrow keys to maneuver to the item being picked. The selected row with be highlighted.
- Press F4 to open a Stock Status screen for a highlighted item.
- Press <enter> to open the Pick Detail screen and pick items for a highlighted line.
SO Enter Item Pick Details Screen (with Pick and then Pack as separate transactions)
At the top of the screen, the item number and shiplist information will display for verification, along with the Recommended Location for picking.
Please Note: The Recommended Location for picking is the location with the greatest on-hand quantity for the item being picked.
Scan Item Number
Scan or type in the item number being picked. This field is required to provide verification that the user is picking the correct item.
Please Note: The long part number or the superseded part number for an item may also be entered into the Scan Item Number field to bring up the results for that item number. For example:
- If 110 is the superseded part number for 100, entering 110 into the Scan Item Number field will bring up results for item 100.
- If 1234567 is the long part number for item 100, entering 1234567 into the Scan Item Number field will bring up results for item 100.
Qty Remain to Pick
This is an informational field that displays the quantity remaining to be picked for this item.
Quantity
Enter the quantity being picked.
- The user may enter a quantity up to but not over the quantity remaining to be picked. (*see note below about quantities and negative inventory)
- Partial amounts may be picked.
- The user may come back to this screen later to pick any remaining balance for the item.
- If “Allow Under Shipment” is selected in SOP Constants, the user will not be required to pick the entire balance of items on the shiplist in order to ship the transaction.
Pick Location
Enter the location from which the item is being picked.
- If the Default In Recommended Location In Pick Screens is enabled in the SOP Constants, the recommended location will pre-fill into the Pick Location field. Hit <tab> or <enter> to accept the recommended location. or change it to a different location before preceding.
- The location entered here does not need to match the Recommended Location. The user may enter any location with enough quantity available. (*see note below about quantities and negative inventory)
- The user may pick a partial balance of an item from one location and then pick the remainder of the balance from one or more other locations.
- Please Note: When lots and serial numbers are allocated, then the locations chosen must contain the lot numbers and serial numbers indicated by the allocation.
*A note about quantities and negative inventory
The SOP picking functions follow the constant settings in the NovoNexus Inventory Constants for negative inventory:
- If the negative inventory constant is set to error a negative inventory transaction, the user will not be allowed to drive inventory negative in a location when picking.
- If the negative inventory constant is set to warn of a negative inventory transaction, the user will be warned, but will then be allowed to drive inventory negative in a location when picking.
- If the negative inventory constant is set for NO error or warning with a negative inventory transaction, the user will be allowed to drive inventory negative in a location when picking, with no error message and no warning.
Serial Number Entry
If the item number being picked is serial tracked, the Serial Number Entry screen will open after the Pick Location is entered.
- A valid serial number for the item must be entered for each item being picked.
- The serial number must have a status of On Hand in the location from which the item is being picked.
- If the serial numbers are allocated to the sales order, the serial numbers must match what is allocated to the sales order.
Once all serial numbers are entered, the user will be redirected back to the So Enter Item Pick Details screen to complete the transaction.
Lot Entry
If the item number being picked is lot traced, the Lot Entry screen will open after the Pick Location is entered.
Depending on the Lot Entry Screen Method set in Inventory Constants, one of the following Lot Entry screens will open.
Standard Lot Entry: Enter the lot number for the item being picked. The lot number is entered one time only.
If lot numbers are allocated to the sales order, the lot number entered must match what is allocated to the sales order.
Serial Lot Entry: Enter the lot number once for each quantity of the item being picked. For example, if there are 10 items being picked, the lot number will need to be entered 10 times.
If lot numbers are allocated to the sales order, the lot number entered must match what is allocated to the sales order.
Once the lot number is accepted, the user will be redirected back to the So Enter Item Pick Details screen to complete the transaction.
Accept the Pick
Hit <enter> to accept the pick.
Please note: If the Perform Unplanned Move on SO PICK to Stage Location constant is enabled, an Unplanned Move transaction to a stage location will take place when items are picked. As soon as the items are picked, they will be moved from their pick location to the stage location indicated in the Stage Loc Unplanned Move Loc constant, and the items will be unavailable for picking on another order. When the sales order is shipped, the items will process out of the stage location in a SALE transaction.
Return to SO Select Item to Pick Screen (with Pick and then Pack as separate transactions)
After accepting a pick, the user will be brought back to the SO Enter Items to Pick Screen to pick the remaining items on the shiplist.
Any items that have been picked in their entirety will no longer show on this screen. Only items with a remaining quantity to pick balance will be displayed.
Continue to select and pick items until done picking. When the last item is picked, the user will see the following message indicating all items have been picked:
When picking is completed, the user can proceed to the Pack Sales Order function. If “Allow Under Shipment” is selected in the SOP Constants, not all items need to be picked to proceed to the Pack Sales Order function.
Unpick Sales Order (with Pick and then Pack as separate transactions)
Items may be unpicked after they are picked and before the order is shipped. If the items have been packed, the unpick function will require them to be unpacked as part of the unpicking process.
Sales Order Number
Enter the sales order number
Shipment
Enter the shipment number. As with the Sales Order Pick screen, entering the whole sales order and shipment number combination into the Sales Order Number field, using the format Sales Order-Shipment Number (for example 583-2), will automatically place the numbers in the correct fields. This can be done either manually or scanning a barcode that has the Sales Order-Shipment number in it.
SO Select Item to UnPick Screen (with Pick and then Pack as separate transactions)
This screen displays all the items available to be unpicked from the sales order, the quantity already picked, and the balance (quantity remaining) that is not yet picked.
Use the arrow keys to maneuver to the item being unpicked. The selected row with be highlighted.
- Press F4 to open a Stock Status screen for a highlighted item.
- Press <enter> to open the UnPick Detail screen and unpick items for a highlighted line.
SO Enter Item UnPick Details Screen (with Pick and then Pack as separate transactions)
At the top of the screen, the item number and sales order information will display for verification. In addition, the total quantity available to unpick is displayed.
Remove Item from Container ID
If the items being removed have been packed, enter the Container ID from which they are being removed.
Qty To Remove
Enter the amount to be unpicked.
Location to Put Back To
Enter the location where the unpicked items will be put back.
Serial Number Entry
If the item number being unpicked is serial tracked, the Serial Number Entry screen will open after the Location is entered.
A valid serial number for the item must be entered for each item being unpicked. In addition, the serial numbers must be the same serial numbers that were previously picked for this sales order. Once all serial numbers are entered, the user will be redirected back to the So Enter Item UnPick Details screen to complete the transaction.
Lot Entry
If the item number being unpicked is lot traced, the Lot Entry screen will open after the Location is entered.
Enter the Lot Number for the items being unpicked. The lot number entered must be the lot number that was used when picking these items.
Hit <enter> to accept the lot number. Once the lot number is accepted, the user will be redirected back to the So Enter Item UnPick Details screen to complete the transaction.
Accept the UnPick
Return to SO Select Item to UnPick Screen (with Pick and then Pack as separate transactions)
After accepting an unpick, the user will be brought back to the SO Enter Items to UnPick Screen to unpick any remaining items that need to be unpicked. Any items that have been unpicked in their entirety will no longer show on this screen. Only items with a remaining quantity to unpick will be displayed.
Continue to select and unpick items until done unpicking. When the last item is unpicked, the user will see the following message indicating all items have been unpicked:
Pack Sales Order (with Pick and then Pack as separate transactions)
Once the sales order is picked, the items can be packed into containers for shipping using the Pack Sales Order function.
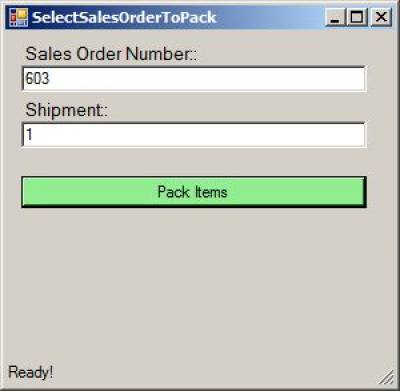
Sales Order Number
Enter the sales order number
Shipment
Enter the shipment number.
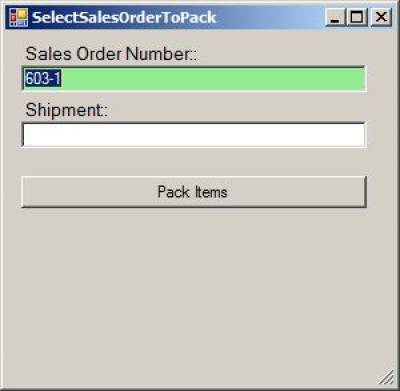
Please Note: Entering the sales order and shipment combination into the Sales Order Number field, using the format Sales Order-Shipment (for example 583-2), will automatically place the numbers in the correct fields.
This can be done either manually or by scanning a barcode that has the Sales Order-Shipment number in it.
Pack Items
Hit <enter> to accept the sales order and shipment number and begin to pack items.
So Select Item To Pack Screen (with Pick and then Pack as separate transactions)
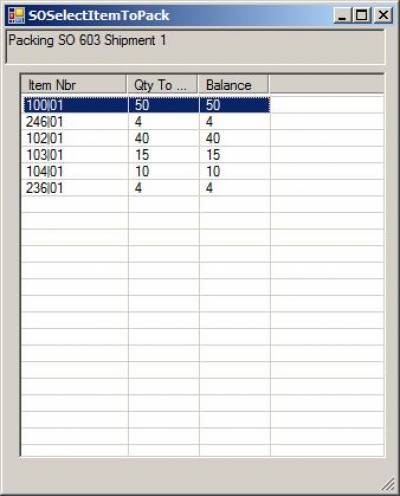
Upon hitting <enter> on the Pack Items button, the SO Select Item to Pack screen will open in another window.
This screen displays all the items to be packed for the sales order, the quantity to pack for each item, and the balance remaining (quantity remaining) for each item to be packed.
Use the arrow keys to maneuver to the item being packed. The selected row with be highlighted.
Press <enter> to open the Pack Detail screen and pack items for a highlighted line.
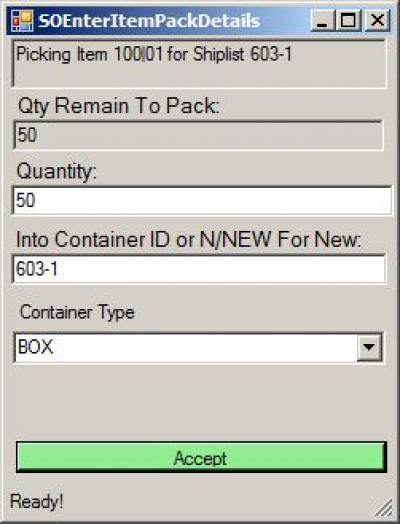
SO Enter Item Pack Details Screen
At the top of the screen, the item number and shiplist information will display for verification, along with the Recommended Location for picking.
Please Note: The Recommended Location for picking is the location with the greatest on-hand quantity for the item being picked.
Scan Item Number
Scan or type in the item number being picked. This field is required to provide verification that the user is picking the correct item.
Please Note: The long part number or the superseded part number for an item may also be entered into the Scan Item Number field to bring up the results for that item number. For example:
- If 110 is the superseded part number for 100, entering 110 into the Scan Item Number field will bring up results for item 100.
- If 1234567 is the long part number for item 100, entering 1234567 into the Scan Item Number field will bring up results for item 100.
Qty Remain to Pick
This is an informational field that displays the quantity remaining to be picked for this item.
Quantity
Enter the quantity being picked.
- The user may enter a quantity up to but not over the quantity remaining to be picked. (*see note below about quantities and negative inventory)
- Partial amounts may be picked.
- The user may come back to this screen later to pick any remaining balance for the item.
- If “Allow Under Shipment” is selected in SOP Constants, the user will not be required to pick the entire balance of items on the shiplist in order to ship the transaction.
Pick Location
Enter the location from which the item is being picked.
- If the Default In Recommended Location In Pick Screens is enabled in the SOP Constants, the recommended location will pre-fill into the Pick Location field. Hit <tab> or <enter> to accept the recommended location. or change it to a different location before preceding.
- The location entered here does not need to match the Recommended Location. The user may enter any location with enough quantity available. (*see note below about quantities and negative inventory)
- The user may pick a partial balance of an item from one location and then pick the remainder of the balance from one or more other locations.
- Please Note: When lots and serial numbers are allocated, then the locations chosen must contain the lot numbers and serial numbers indicated by the allocation.
Accept the Pick
Auto Ship Sales Order
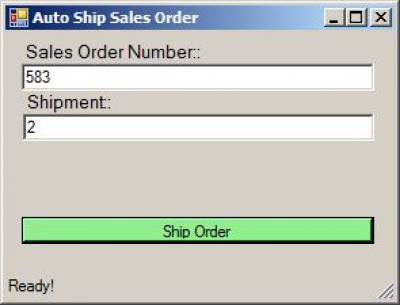
The Auto Ship Sales Order function will ship an entire sales order from the allocated locations in one move.
PLEASE NOTE:
- There is no picking, no packing, no confirming, etc. with this function.
- This function does not provide any warnings about negative inventory even if warnings are set in the inventory constants.
- This function does not support shipments with lots or serial numbers. If a lot traced or serial number tracked item is included with a shipment at Auto Ship, the transaction will be rejected.
- Use this function with caution and restrict access to this function to those who understand its capabilities.
Sales Order Number
Enter the sales order number
Shipment
Enter the shipment number. Entering the whole sales order and shipment number combination into the Sales Order Number Field, using the format Sales Order-Shipment number (for example 583-2), will automatically place the numbers in the correct fields. This can be done either manually or scanning a barcode that has the Sales Order-Shipment number in it.
Ship Order
Hit <enter> to accept the transaction and ship the sales order. The shipment details will be sent to your ERP system.

